Using inkPEEK
How to Show Your Tattoo Artist Exactly What You Want
Most tattoo disappointment isn't bad work — it's a good artist faithfully executing a brief that never matched what the client had in mind. The fix is cheap: replace “about this big, right here” with an image of the design on your own body. Here's what to prepare and how to hand it over.
Published August 5, 2026
Why “about this big, right here” goes wrong
A consultation compresses three spatial decisions — where exactly, how big, at what angle — into words and a finger pointed at your arm. The artist translates that into a sketch through their own assumptions. Usually they're close. Sometimes they're not, and nobody finds out until the stencil is on your skin and the appointment clock is running.
A preview screenshot removes the translation step. The artist sees the same image you validated — same spot, same scale, same tilt — and the conversation starts from agreement instead of reconstruction.
The consultation package: what to bring
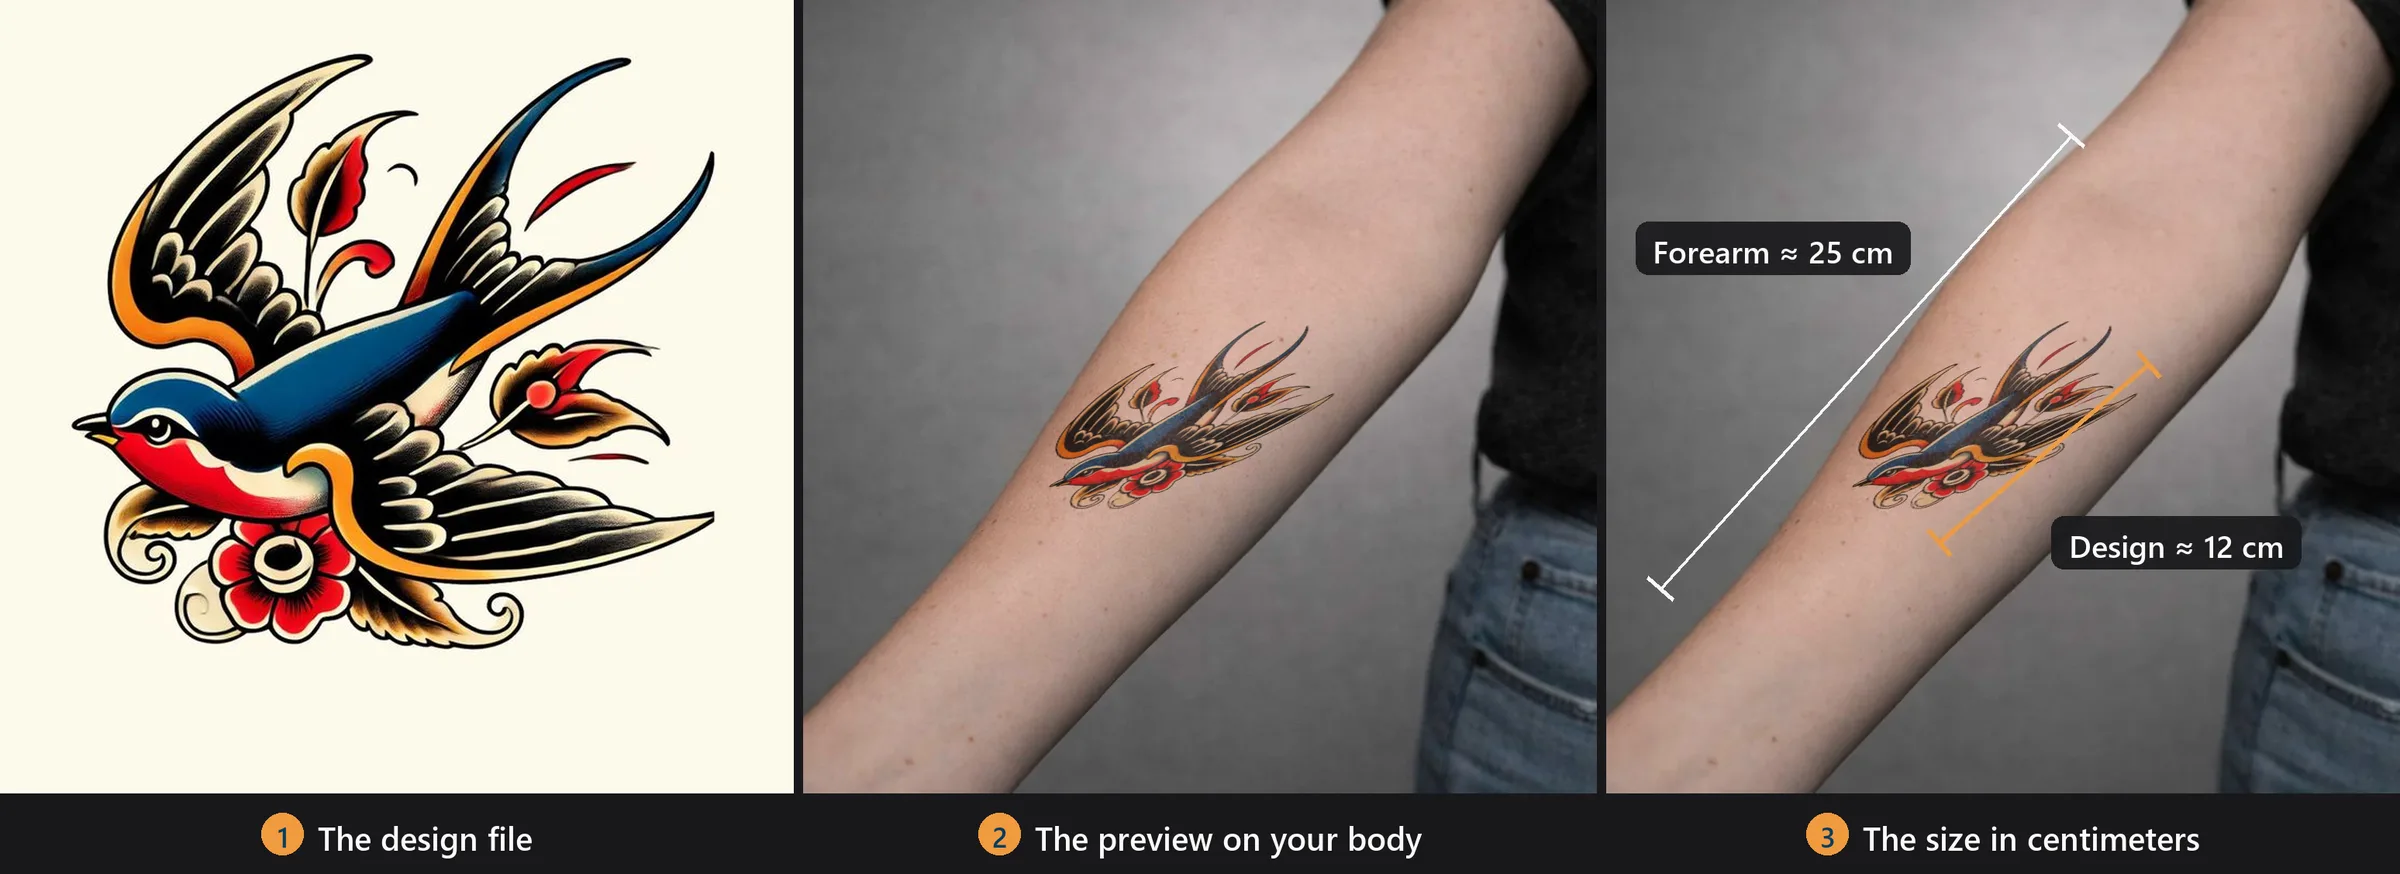
The original design file
The cleanest, highest-resolution version of the design you have — the artist works from this, not from the preview. A photo of a sketch works; a crisp PNG works better.
A preview screenshot on your body
One screenshot of the design placed on a photo of the actual spot, at the size you validated. This single image answers placement, size, and angle at once — the three things words describe worst.
A real-world measurement
One number: "about 12 cm tall." Measure the area on your body and scale it from the preview. Artists think in centimeters, not in fractions of a phone screen.
Optional: one or two alternates
If you hesitated between two sizes or two spots, bring both screenshots and say so. "I preferred A but considered B" is useful information, not indecision.
Not sure about the size yet? Settle it first with the 3-size method.
Making a screenshot your artist can work from
- 1
Photograph the real spot
Use a clear, well-lit photo of the exact placement — the same photo rules that make a good preview make a good reference. See the placement guides for spot-specific tips.
- 2
Place the design carefully
Position, size, and angle it the way you actually want it. Spend the extra two minutes on the angle — "slightly tilted toward the wrist" is exactly the nuance that gets lost in conversation.
- 3
Screenshot the final result
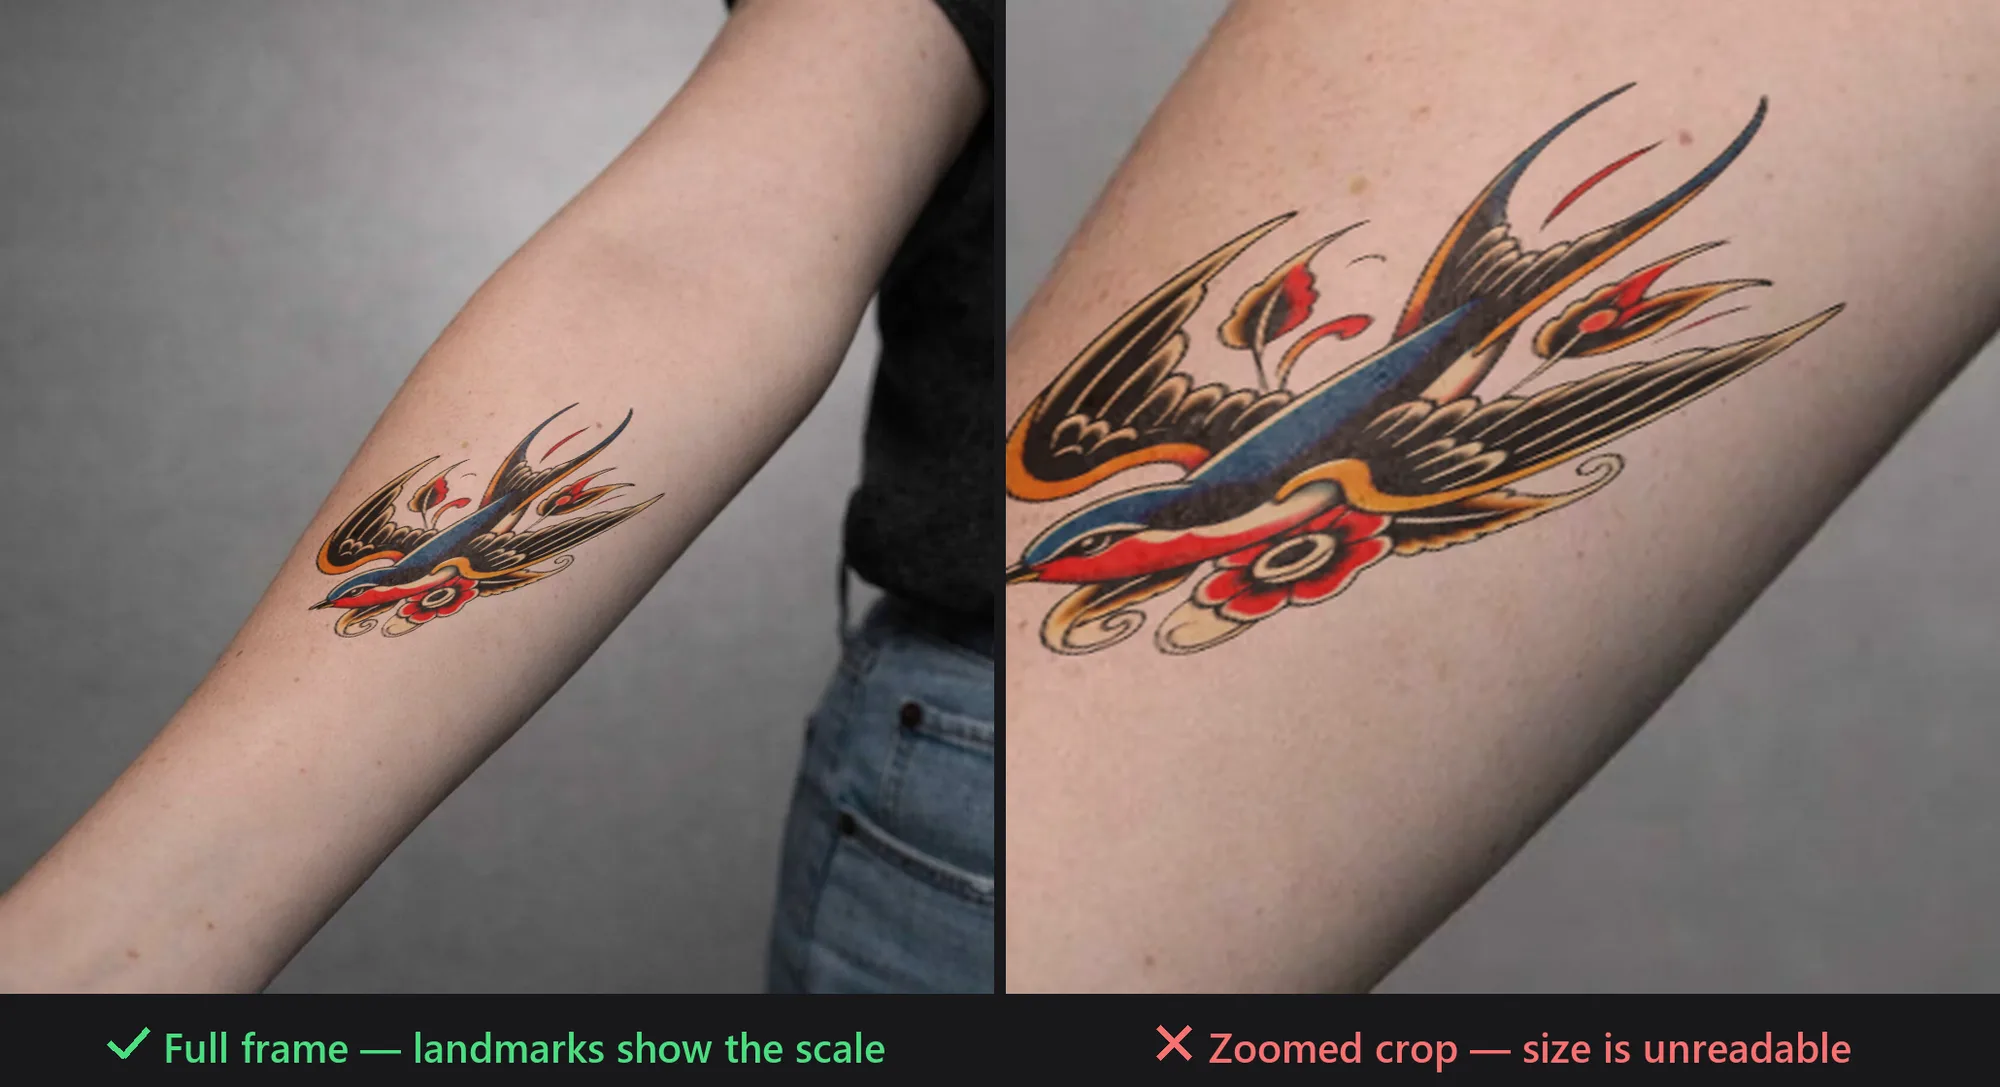
Capture the full frame, not a zoomed crop — the artist needs to see the design in the context of your body, with landmarks like your elbow or shoulder visible for scale.
- 4
Send it ahead if you can
Many artists take booking inquiries by email or DM. Attaching the design file, the preview screenshot, and your measurement gets you a faster, more accurate quote — and a better-prepared consultation.
What it changes on the artist's side
Quotes get more accurate
Price depends heavily on size and placement. A screenshot with a measurement lets the artist quote the piece you actually want, instead of a range that covers their uncertainty.
The consultation starts further ahead
Instead of spending the session reconstructing what you mean, the artist reacts to a concrete proposal — and their expertise goes into improving it, not decoding it.
Fewer revision rounds on the stencil
The stencil the artist prepares is far more likely to match your expectation on the first try when they’ve seen the size and placement you validated.
It shows you’ve thought it through
Artists take clients more seriously when the request is specific. A validated preview signals you’ll show up, sit well, and not ask for a redesign at the appointment.
One caveat: the preview shows placement and scale, not final rendering. Line weight, shading, and how the design adapts to your skin are the artist's craft — bring the preview as a brief, and leave room for their judgment.
Frequently asked questions
Will an artist mind being shown a mockup?
The opposite, in most cases — ambiguity is the expensive part of consultations. Just present it as "this is the size and placement I want" rather than "reproduce this exactly," and stay open to their technical adjustments.
Should I send the preview before the consultation or bring it in person?
Both. Send it with your booking inquiry so the quote reflects the real piece, then have it on your phone at the consultation for the placement discussion.
What if the artist suggests a different size or spot?
Listen — they know how skin, movement, and aging affect a design better than any preview. The point of bringing one isn’t to win the discussion; it’s to make sure the discussion is about the same tattoo.
Walk in with the answer, not the question
Make the preview, screenshot it, and your next consultation starts from “yes, exactly that” instead of twenty minutes of pointing.
Try inkPEEK free