Using inkPEEK
How to Choose Your Tattoo Size — Preview It First
Ask people what they'd change about their tattoo and one answer comes up constantly: “I wish I'd gone bigger.” Size is the decision most often regretted — and the hardest to judge from a drawing on paper. This guide walks through a simple method for settling it with your own eyes, using a preview on your own body, before any needle is involved.
Published August 5, 2026
Why size is the decision people regret
Style can be chosen from an artist's portfolio. Placement can be reasoned about. But size lives in the gap between imagination and reality: a design that feels bold on a sketchpad can read as timid on a shoulder, and a “small, subtle” piece can turn into a gray smudge from two meters away.
The asymmetry makes it worse. A tattoo that turned out too small is hard to fix — adding to it later rarely looks planned. A tattoo sized honestly for its placement settles in, stays readable as the ink ages, and looks intentional. That's why the most common regret isn't the design — it's the ten percent of size courage that was missing at the decision moment.
The fix isn't “always go bigger.” It's replacing guesswork with a look at the real thing — which is exactly what a preview on your own photo gives you.
The 3-size method
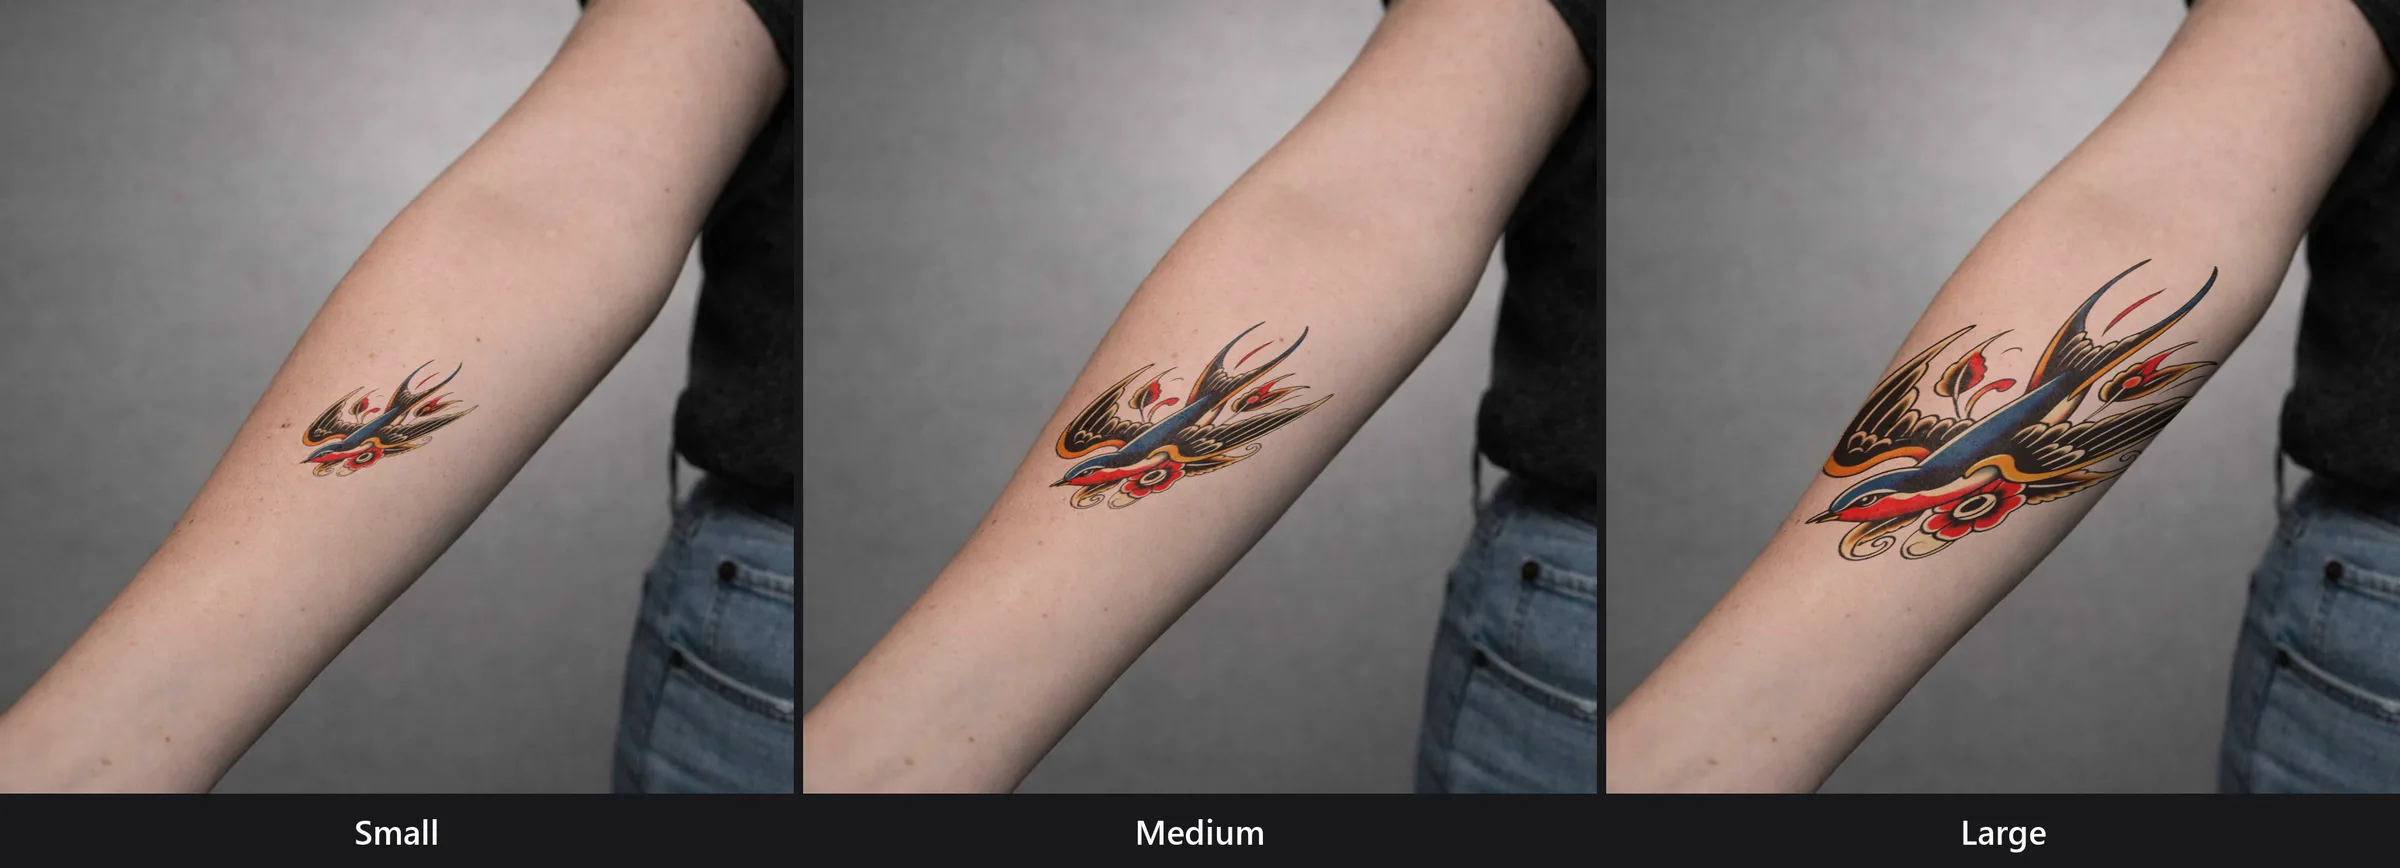
Fifteen minutes with the preview tool is enough. The point is to stop comparing sizes in your head and put them in front of your eyes instead. Here's the same design previewed with inkPEEK at three sizes on the same forearm photo — notice how differently each one carries:
- 1
Photograph the exact spot
Take a clear photo of the placement you’re considering, with the whole area in frame — elbow to wrist for a forearm piece, hip to knee for a thigh piece. The preview scales the design relative to your body, so the frame is your ruler.
- 2
Place the design at three sizes
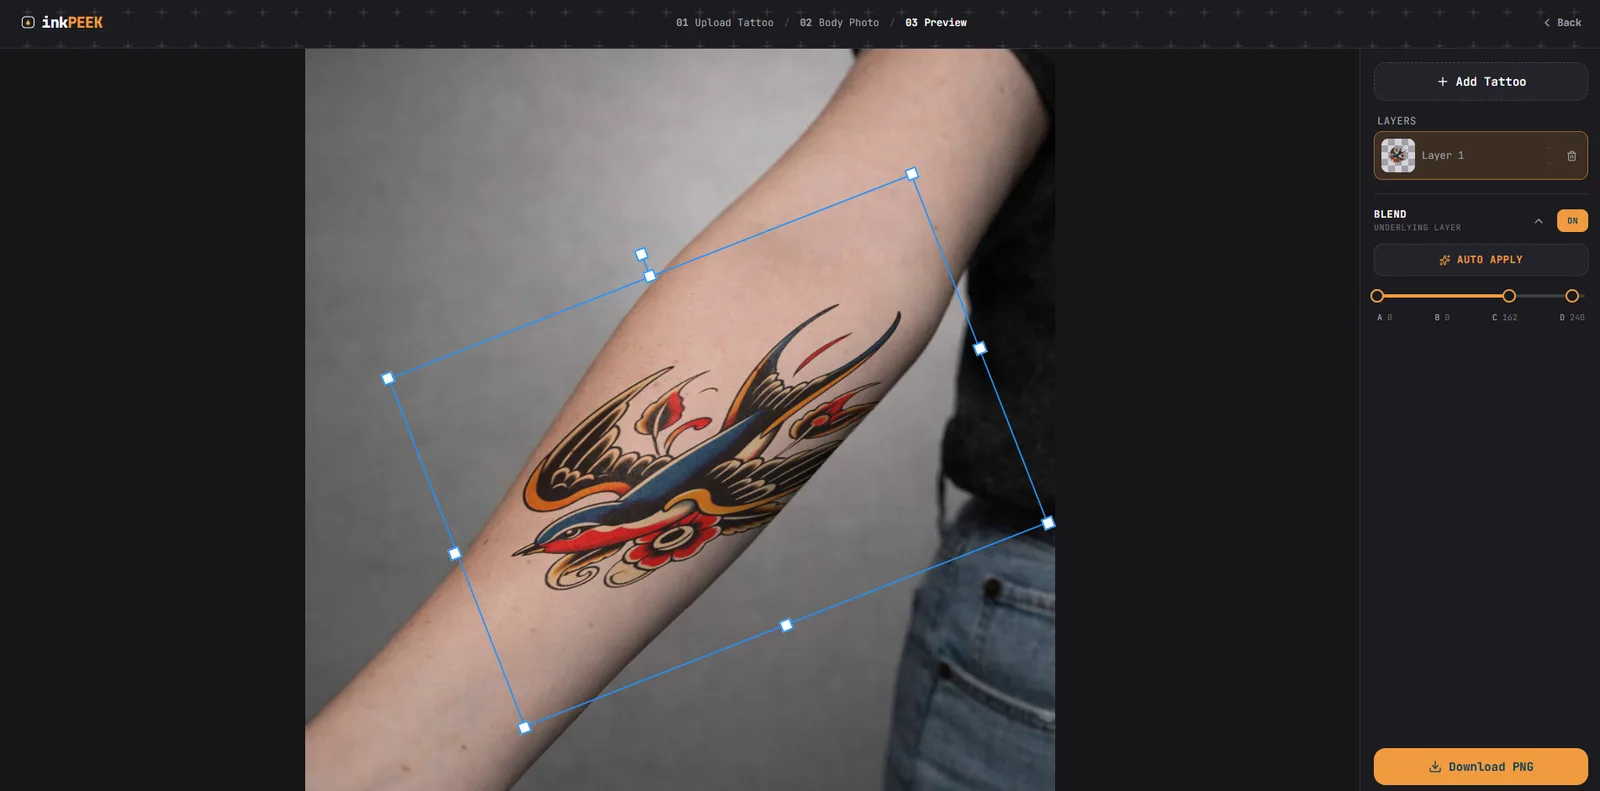
In the editor, position your design at the size you first imagined. Screenshot it. Then make it noticeably smaller and screenshot again. Then noticeably larger — about 30% each way — and screenshot a third time.
- 3
Compare the screenshots side by side
Don’t judge from memory — put the three screenshots next to each other. Almost everyone finds their first instinct sits at the small end once they see the options together.
- 4
Sleep on it, then re-check
Look at your favorite again the next day at actual arm’s length, not zoomed in. A size that still feels right after a day and a fresh look is a size you can walk into the studio with.
Turning the preview into centimeters
Your artist will ask for a number, so convert the preview you chose into real-world size. It takes one measurement:
- Measure the body area in your photo — say your forearm is 25 cm from elbow to wrist.
- Look at what fraction of that area the design covers in your chosen preview — say about half.
- That's your number: roughly 12–13 cm tall. Tell your artist that, alongside the screenshot.
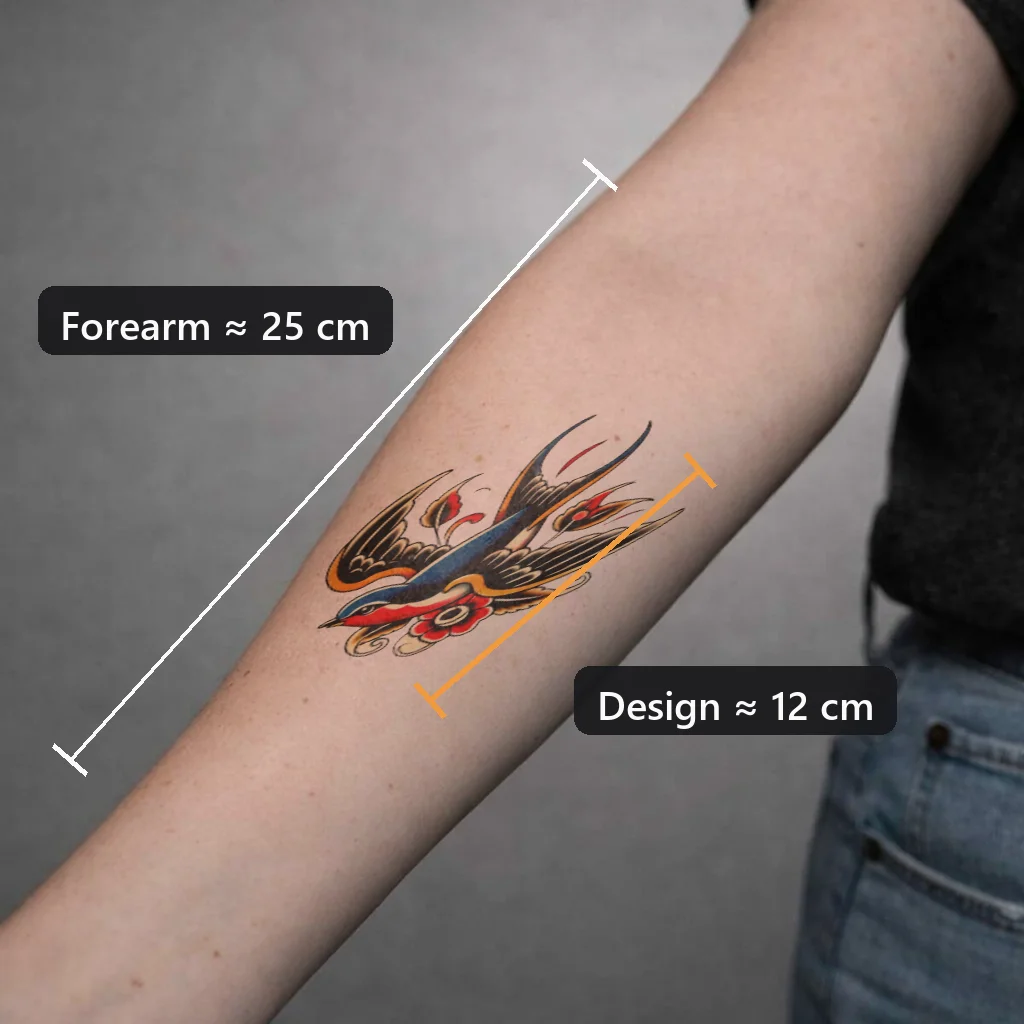
It doesn't need to be millimeter-exact — the artist will fine-tune with a printed stencil at your appointment. What the number and screenshot do is anchor the conversation to the size you actually validated, instead of a verbal “medium-ish.”
The same size reads differently by placement
A 12 cm design dominates a wrist, sits comfortably on a forearm, and gets lost on a back. Before you lock in a size, make sure it's sized for the canvas it's going on — each placement guide below has photo tips and a real preview example for that spot:
Common sizing mistakes
Judging size on a zoomed-in phone screen
Zoomed in, every design looks big and detailed. Judge the preview at the distance people will actually see the tattoo from — roughly arm’s length.
Shrinking a detailed design to make it "safe"
Fine lines and small text need physical space to stay readable as ink spreads slightly over the years. If you love the detail, the honest options are keeping the size or simplifying the design — not scaling it down.
Choosing size before choosing placement
The same 10 cm design fills a wrist and disappears on a back. Decide where first, then size the design to that canvas — previewing on the actual photo makes this automatic.
Ignoring how the body moves
A size that fits a straight arm can crease or distort when you bend it. If the spot flexes, preview a photo in both positions before locking the size in.
Frequently asked questions
Is the size in the preview true to life?
The design is scaled relative to your body in the photo, so proportions are accurate to the frame. To translate it into centimeters, measure the real area (say, your forearm is 25 cm long) and compare — if the design spans about half your forearm in the preview, plan for roughly 12–13 cm.
What if I can’t decide between two sizes?
Take the larger one to your artist and ask. Artists resize designs at consultation all the time, and scaling a design down is far easier than adding detail to scale it up. Your preview screenshots give them exactly the context they need.
Do small tattoos really age worse?
Not inherently — simple small designs age fine. The risk is packing detail into a small area: ink spreads slightly over years, and tightly spaced lines can blur together. If your design is detailed, give it room.
Settle the size question today
Upload your design and a photo of the spot, try it at three sizes, and walk into your consultation knowing — not hoping — it's right.
Try inkPEEK free